|
Heres some Info On Multiplayer
Multiplayer
TWINE's multiplayer game rivals that of GoldenEye. Super-smooth fast action extends through fourteen levels of goodness. Play by yourself or with three of your closest stromies. Use the information below to wade through the various menus, then go play!
Multiplayer Menu
Character Setup
This menu allows you to determine your character's stats and appearance before heading into battle. Not only can you change the stats of the player characters, but the AI Bots as well. Select the Player you'd like to manipulate by using the C-up and down buttons. Move through the right side of the menu with the D-Pad.
Name
Give your player some cute name here. You have 8 characters to work with.
Health
Even the scales in uneven duels by manipulating how much health your character begins with. If you want to survive longer, double stuff with a score of 200. If you think you're all that, take the score down to 10 and see how you fare.
Radar
Radar comes in many flavors. You can choose to follow your Team Only, track progress of Enemy Only, watch Players Only (no Bots), or see Specials Only. Choosing Off, as you might expect, hides the Radar display.
Skin
Skin determines how your character will look. Choose between the fourteen original skins (taken from characters in the game). The type of player will determine how he/she will fight as an AI Bot.
Skin Type As Player Type As Bot
James Bond (007) Good Good, Team Player
Doctor Jones Good Good, Collector
Renard Evil Evil, Assassin
Elektra King Evil Evil, Assassin
Cigar Girl Evil Evil, Assassin
Valentin Zukovsky Good Good, Normal
Bullion Evil Evil, Collector
Gabor Evil Evil, Team Player
Sir Robert King Good Good, Normal
Lachaise Evil Evil, Collector
Davidov Evil Evil, Team Player
Moneypenny Good Good, Collector
Robinson Good Good, Team Player
M Good Good, Team Player
Game Type
Determine the type of game you'd like to play with this menu. There are hundreds of possible combinations here, as you can mix and match the Scenarios and Weapon Modes listed below:
Scenario Description
King of the Hill Players score extra points by possessing the Hill, a special area in each map. Keep your opponents away from The Hill.
Uplink Each map contains 3 Uplink points, which can be possessed by touching them. Possessing an Uplink adds points to your score, so make sure you stay in control of them all.
Last Agent Standing Each player has a set number of lives. The last player alive wins the game.
Arena Standard comptetive mode, with all of the players working against each other.
Capture the Flag Each team has a flag at their base. Capture the opposing team's flag and return it to your base to score.
Team Arena Team competitive mode, with teams of players working against each other.
Weapon Mode Description
Rapid Fire Starting weapon: Soviet KA-57
Starting gadget: Body Armor
Pickups available: Munitions Belguique POW90, Meyer Bullpup, Mustang MAR-4
Close Combat Starting weapon: Wolfram P2K
Pickups available: Raptor Magnum, Mustang .44
Sniper Combat Starting weapon: Suisse SSR4000
Pickups available: Deutsche M95, Deutsche SA90, Night Vision Goggles
Explosive Starting weapon: GL 40
Starting gadget: Body Armor
Pickups available: Mustang MAR-4-GL, RL 22, AT240 SENTINEL, Sticky Grenade, Frag Grenade
Standard All of the players can use any of the pickups on the map.
Combat Starting weapon: Raptor Magnum
Starting gadget: Body Armor
Pickups available: Deutsche M45, Meyer Bullpup, GL 40, RL 22, Frag Grenade
Covert Starting weapon: Silenced Wolfram P2K
Starting gadget: Night Vision Goggles
Pickups available: Deutsche M95, Suisse SSR4000, Delta 900 Mag
Player Numbers (1-4, depending)
Only four players can be in any given arena at a time. This includes AI Bots. If you have four human players, there will be no room for more. This menu will only allow you to select as many players as there are controllers plugged in.
AI Bot Numbers (1-4, depending)
Set how many AI Bots will appear in the deathmatch. This can be set for up to three in a single player match. However, the total number of players can never exceed four.
Screen Split
In two-player action, you can determine here how the split screen will be displayed: either horizontally or vertically.
Weapon Detail
Select Low, Medium, High or Off. Low shows a lesser amount of weapon detail, and High displays the most detail. Medium or Low are the best settings, as they diminish on slowdown. Setting this to Off will display the weapon as invisible.
Friendly Fire
Toggling Friendly Fire to on will make team players susceptible to injury from your (and other team members') bullets.
Duration
Set how long the match will last. The time denominations you can select are 1:00; 2:00; 3:00; 4:00; 5:00; 10:00; 15:00; 20:00; 25:00; 30:00 or Unlimited. Unlimited allows the game to go on indefinitely, or until other criteria (Maximum Score) are met.
Maximum Score
Set the number of kills required to end the match. This can be used in conjunction with the Duration to produce an "either-or" situation--either time runs out or someone reaches the kill count. Max Score can be set from 10-200 in increments of 10.
Note: Once you are happy with all of the game settings, select start from the Multiplayer Menu. If more than two players are selected, you will be taken to a team selection screen. Cycle through the list of participants with the C-up and down buttons and change the team alignment with the D-pad (left and right). If there is a clash in player skins (meaning that more than one player has selected the same skin), you will be taken to another screen to sort this out. Manipulate the player skins with "Change" next to them to continue.
Maps Labyrinth
The labyrinth map is just as it sounds: a twisting maze through high shrubs and brick walls. This is a run-and-gun fiesta perfect for Capture the Flag and King of the Hill matches.
There are several points of interest on the map. A few of the long hedge corridors dead end in small brick alcoves replete with weapons and ammo. These are great for camping if you have a powerful enough weapon.
In addition, a central brick courtyard is home to two extra-juicy items (provided you're playing in Standard Mode). Not only is there a sweet RL 22 here (great for shooting down the long, shrubby corridors), but also a pair of X-Ray glasses that will allow you to see through walls. Use these to watch your opponents as they creep through the hedges toward you. Stand in the central circle or one of the brick cul de sacs and let your friends come to you.
Weapons (Standard Mode):
X-Ray Glasses, RL 22, Raptor Magnum, Frinesi Special 12, M8 POW90, Mustang MAR4-GL, Soviet KA-57, Deutsche M45, Ingalls Type 20, Frag Grenade.
--------------------------------------------------------------------------------
Merchant
This multiplayer level is based in the bank building from the Courier single player mission. This is a great multi-level Combat arena, best when played with four players. The narrow corridors and hive of upstairs rooms make for rowdy action. The stair and elevator areas are perfect for sniping and surprise attacks.
Head upstairs to the ornately decorated office to grab the Frinesi shotgun, great for these close quarters. Across the hall (and through the next room) is a Body Armor, which will give you a significant advantage.
Tip: It is important to keep an eye on your opponent's portions of the screen to see where they are on the map. By doing this, you can surprise them as they come up the stairs or elevator, or avoid them if they are camping out.
Weapons (Standard Mode):
Mustang MAR-4, Frinesi Special 12, M8 POW9, Deutsche M95, Raptor Magnum, Ingalls Type 20, Meyer Bullpup, Meyer TMP, Soviet KA-57.
--------------------------------------------------------------------------------
Istanbul
This is a great spot for King of the Hill if ever there was one. The wide streets and great sniping capabilities provide a balanced team-based game experience in the dusty streets of ole Instanbul.
Get your hands on a Magnum .44 early. It has massive stopping power, plus a bit of zoom capability--perfect for these mean streets. Head inside the buildings for great weapons and other perks. The gray, brick building (near a frequent spawn point) contains a Body Armor that is indispensible.
Head up the indoor ramps to get to the upper rooftops. On one of the high walkways, you'll find a Deutsche SA90. Grab it and camp. These lofty perches will net many a frag as you pick off the completely exposed suckers running around the courtyard below. Or, if you prefer a cruder method, pull out the GL 40 and pummel the crowd with grenade rounds.
Weapons (Standard Mode):
GL 40, Body Armor, Mustang .44, Deutsche SA90, Frinesi Special 12, Meyer Bullpup.
--------------------------------------------------------------------------------
Field of Fire
Field of Fire is more fun the more people who are playing it. It is another maze-type level through fiery cave tunnels. Best played in Combat or King of the Hill modes.
The key to this level is getting to the swank items and exploiting them. Next to a steamy pond, you'll find a suit of Body Armor. This should be a frequent stop on your travels. Another good destination is a small raised cliff. At its base is an AT20. Grab it, then head up top to get a look at the surroundings. Watch all the entrances from here. When enemies appear, let them taste the fury of your missiles.
Once you get a powerful weapon, head to the terminal cave (your original spawn point). This is a true dead end and a great camping place, if that's your thing. Otherwise, scoop up the Ingalls and run like a banshee through the caves, raining fire on all that crosses you.
Weapons (Standard Mode):
Mustang MAR-4GL, Meyer TMP, M8 POW90, Ingalls Type 20, AT20 SENTINEL, Frag Grenade, .
--------------------------------------------------------------------------------
Hidden Volcano
Hidden Volcano is a great two-tiered romp ripe with awesome fragging opportunities. This is another great Combat map in which the creative killer will thrive.
The upstairs control room (the one with the world map in it) not only serves as an easy way to cut across from one down ramp to the other, it holds a load of guns n' ammo. Watch for attacks from behind here. They're quite popular this Fall.
There is a downstairs room that will be the answer to all of your multiplayer prayers. In this chamber (full of scattered crates), you'll find both Body Armor and a GL 40, two elements to a successful Hidden Volcano campaign. Once you have these, head to the elevator area and watch for enemies using the lifts. As the elevator rises, drop a grenade on them. Diabolical.
The lifts can also be used for ambush. Take a look at your opponent's position on the screen. When he/she crosses the warhead room, pop up and blaze for a surprise attack.
Weapons (Standard Mode): Body Armor, GL 40, Mustang MAR-4, Delta 900 Mag.
--------------------------------------------------------------------------------
Silo Surprise
Loosely based on the Masquerade mission level, Silo Surprise is one of the least inspired maps of the game. The downstairs level is a run-and-gun series of corridors and linked rooms. The upstairs provides lots of sniping opportunities, without the hindrance of a railing.
The best weapon in the level--the MAR-4GL--can be found atop a bank of industrial fans. This weapon is great, with rapid-fire and a clip that won't run out as you chase down your prey. Second to the Mustang is its kid brother the .44. Often, the action is in close quarters. You can always count on the .44 to end things quickly in these circumstances. It can be found atop a ramp (the only section of the level bathed in red light).
This same passage leads to the walkway overlooking the fan room, a busy conduit that runs across the level. The walkway provides good sniping possibilities, but watch out for the homies creepin' while you're sleepin'.
Weapons (Standard Mode):
Frinesi Special 12, Meyer Bullpup, Mustang MAR-4GL, M8 POW90, Raptor Magnum, Mustang. 44., Ingalls Type 20, Suisse SSR4000.
--------------------------------------------------------------------------------
Frostbite
Frostbite is a massive level set in the snows surrounding Azerbaijan. This is a wide-open map with a couple of escpae tunnels that cut under the snow.
The best way to approach this map is to find and defend the small cabin here. Although you have to keep an eye on the ramp in the center of the floor, this is a swank spot for premium pickatude. Since the primary spawn point is right next to the cabin, you can rack up a string of kills if you have a power weapon. If you need to make an early exit, take a trip down the tunnel.
If you're looking for some extra protection, there is a Body Armor that sits on one of the wooden bridges that extend across the snowy gorge near the cabin.
If you're into the sniping thing, follow the tunnels to a steep ramp that leads up to a snowy pass. From here you can survey (and kill) all in the valleyt. Another fun thing to do is to patrol the ridges, waiting for enemies (fish) who collect in the snowy trenches (barrel). If you have Frag Grenades, this is especially delectable.
Weapons (Standard Mode):
Body Armor, Frinesi Special 12, Suisse SSR4000, Meyer TMP, Mustang MAR-4, Frag Grenade, Deutsche SA90.
--------------------------------------------------------------------------------
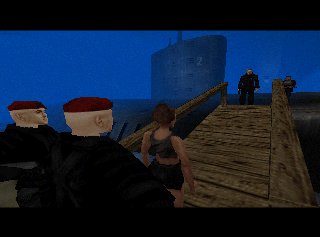
Submarine
Another rather standard level, Submarine will have you chasing each other's tails through scads of rooms. Based on "A Sinking Feeling," this level is best fought with a good close-range weapon in hand. This is the classic dash and blast, and doesn't have much room for campers.
The best position in the level is in the map room, with your back to the map. This gives you a view out through the wide window that looks into the next room and adjacent hallway. Or you can back yourself into the corner of the steering control room (it has a black and white patterned floor). With a powerful enough gun, you can pin down this spot for a good while. Some of the hostage rooms (the gray chambers where they held Christmas in the single player) are good for a little cover, but can be death traps if you get caught inside with superior firepower.
Either of the powerful Magnum-style guns will treat you right in this level. Find them and love them.
Weapons (Standard Mode):
Deutsche M45, Meyer Bullpup, Soviet KA-57, Raptor Magnum, Mustang .44.
--------------------------------------------------------------------------------
Flashpoint
Talk about monochromatic! Flashpoint looks like an empty holodeck level, with a bunch of interconnected gray rooms marked by grids. Snag the Night Vision goggles in the tracking room (the one with the long pipeline map in it). This will help you see enemies from a distance, as they tend to blend into the gray surroundings.
This level is a fairly straightforward tunnel scramble, except that it has quite a few doors. Watch out... it's easy to get hung up on these as you're trying to get from room to room. If you are low on health, it is better simply to run a circuit through the open corridors than to risk pausing in front of a door.
The best weapons on this level are the rapid-fire M8 POW90 and Mustang MAR-4, simply because they have spraying power to cover a moving target as you chase your foes incessantly through the halls.
Weapons (Standard Mode):
Body Armor, Meyer Bullpup, Night Vision, M8 POW90, Frinesi Special 12, Deutsche M95, Mustang MAR-4.
--------------------------------------------------------------------------------
MI-6
You'll recognize this level from the King's Ransom map in the single player mode. Another indoor map, MI-6 is a honeycomb of confusing hallways. Best played as a straight-up blast fest, this level is awesome on Combat and Last Man Standing settings.
Since there are doorways everywhere here, the best thing is to simply keep moving. If you insist on camping, grab a Magnum and head all the way back to the red or blue lit rooms. There is only one entrance in the deepest of these, and it is pretty easily held with that kind of stopping power.
In the blue-lit rooms, you'll find a Frinesi, which is an awesome force in these tight halls. Pursue the rabbits and fill them full of shot.
Weapons (Standard Mode):
Raptor Magnum, Meyer TMP, M8 POW90, Frinesi Special 12, Deutsche M45.
--------------------------------------------------------------------------------
Forest
The Forest has a bit of everything. The crisscrossing forest paths provide all kinds of ambushing and chasing fun. The ridges leading to the river are replete with snipability. The bridge... well, the bridge is a world unto itself. This map is awesome on almost every mode.
Stashed in the forest (as you may remember from the Midnight Departure level)are a pair of aluminum buildings, which are quite obvious, as they sport the James Bond logo. These buildings are home to the GL 40. Grab it and head up the metal ramp inside. If anyone approaches the door, bomb them silly.
Another good camping spot is on the cliffs leading to the river. Climb up top and prey on the poor bastards who dare trespass below an expert marksman!
Sniping is all well and good, but the real fun of this level waits at the end of the bridge. Here, you'll find an AT20 SENTINEL missile launcher and some Body Armor. Time to hunt! With the suit of armor, you're protected from stray bullets. With the AT20, you've got enough firepower to take down a gunship, except that you'll be using it on your measly flesh and bone enemies. Remember: the explosion is as good as a direct hit. If you can't draw a direct bead on a foe, try to blast the rocket into the rock behind them to end things quickly. After awhile, this level becomes a mad dash to the bridge to grab these items. Defend the bridge and keep them for yourself. Simple as that.
For an extra edge, snatch up the Night Vision goggles near the tall cliffs at the end of the river. These will help you see creeping foes hiding in trees and rocks.
Weapons (Standard Mode):
Soviet KA-57, GL 40, AT20 SENTINEL, Body Armor, Deutsche M95, Night Vision, Meyer TMP.
--------------------------------------------------------------------------------
Sky Rail
Another amazing level, Sky Rail takes place in and around a ski lodge. This level is a sniper's paradise. Head into one of the two cable car hoists ground level doors. Follow the ramps up to the top most roof to find Body Armor. Then get inside the cable car and cruise high over the snow, spraying those unlucky enough to be in the open below.
Note:Although the rooftops are enticing, they are also dangerous. You are highly visible and susceptible to attack from those below. In addition, if you fall from this height, you will die.
There are plenty of sniper weapons available here, and some heavy firepower as well. The Suisse SSR4000 is a great weapon for quickly picking off people in the snowy plaza below. It is located on the red building (opposite the Body Armor). Behind a group of crates just inside the entrance to the red-flagged building is a RL 22. Use this to pick arrogant snipers off of the rooftops or blast enemies in the long, snowy passages connecting the two sides of the map.
Weapons (Standard Mode):
Body Armor, Meyer TMP, Raptor Magnum, Mustang .44, RL 22, Meyer Bullpup, Suisse SSR4000.
--------------------------------------------------------------------------------
Air Raid
More of a gimmick than anything, the Air Raid level takes place aboard a pair of airborne stealth bombers. There is little room to move, and as a result, the powerful Frinesi is king. Once you get it, head up to the cockpit and camp. No one will be able to get near you as you spray them with shot.
There are two wings and both are spawn points. You don't want to spend any time on them or you'll get carried off by the whipping wind. However, if you see an enemy out there, pause at the doorway and blast him. The force from the shot may send him over the edge.
There is a long airbridge connecting the two planes. Run out of the back hatch to get on the trailing plane, then snag the SSR4000 and snipe at the exit door. If you are a good sniper, you can do this all day, provided no one spawns in your area.
Weapons (Standard Mode):
Frinesi Special 12, Soviet KA-57, Ingalls Type 20, Suisse SSR4000, Deutsche SA90.
--------------------------------------------------------------------------------
Castle
The Castle level is a lot like the earlier Silo Surprise. There are a lot of balconies to snipe from and a group of fairly open rooms below. The stained glass room provides the best view of the entire level. From here, you can cover action below as well as the situation developing on the walkway. A good weapon to hold the room down is the Mustang .44.
Grab the RL 22 from the library and back yourself into the corner here. Now equip that bad boy and get ready to party. The first person through one of the four visible doors will be fricasee.
Weapons (Standard Mode):
Raptor Magnum, RL 20, Frinesi Special 12, Mustang .44.
No i dont want to go on the sub-Too Cold
|


